Making Paper Bricks: Part 2

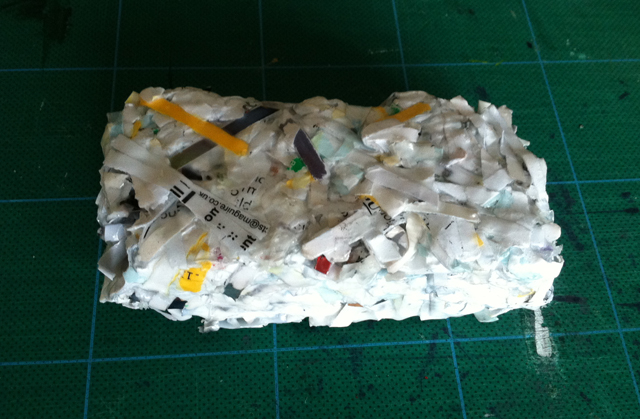
Since my post earlier on this week about making bricks out of waste paper, I thought I’d do an update on how the bricks dried. I ended up making three kinds of bricks – paper, pulp and pulp + PVA glue. The paper bricks dried the fastest but were the least strong, as soon as they came out of the compressive mould they started to grow and let air back into the structure, creating quite a weak brick. The pulp bricks were slightly stronger but still had a bit of a flex when you press them. They took longer to dry; in the end I had to put them and the PVA bricks in the oven for about four hours as the radiators didn’t quite do the job.
The PVA bricks were by far the strongest although took a really long time to dry. They shrunk as the moisture was removed which was interesting, so you’d need to make them bigger than you wanted them then probably sand them down to the correct shape. They didn’t flex when you press them, but would need further tests to determine the actual strength.
Having dried out the bricks I then looked at the effect of painting PVA onto the paper and pulp bricks post-compressing and drying. I wanted to see if this added strength as well as a waterproof layer. Interestingly it did, with both the paper and pulp bricks becoming significantly stronger. However, because of the irregular shape it was really hard to get the glue into all the gaps; ideally it would be dipped into the glue to ensure complete coverage.

To complete the exercise I decided to make the equivalent of a glu-lam cardboard brick. I did it at a 1:2 scale like the paper bricks, and glued each piece together with PVA. This formed an incredibly strong brick which I then painted with PVA to seal it. This worked the best out of all the experiments and would be interesting to look into further. I’d like to look into creating a beam out of this to see its strength once you start to add length; the brick wouldn’t really be the ideal shape for this technology. The PVA coating worked well at waterproofing the brick although I would like to do at least three coats before testing this more vigorously.


Comments
One Response to “Making Paper Bricks: Part 2”Trackbacks
Check out what others are saying...[…] https://clarewashington.wordpress.com/2012/11/30/making-paper-bricks-part-2/ […]